The finish is the final part of the drive where the rower draws the handle(s) in towards his body.
The finish is also where the blade is taken out of the water.
The finish occurs at that point in the stroke when the boat is moving at its fastest and the blades change from applying pressure against the water in one direction to moving freely in the air in the opposite direction.
- Imagine throwing a ball without being able to use your fingers at the end of the throw; trying to skip a stone without a flick of your wrist, jumping high without being able to stretch your legs out to your toes.
Rowing without an effective finish is the same. A good clean finish can add the last available fraction of acceleration to a good stroke.
- Remember setting your bike upside down and putting your fingertips through the the spokes to spin the wheel. (from our Catch article)
- What happened when you were too slow pulling your fingers out once the wheel was moving?
- What happened when you didn’t pull your fingers straight out (at right angles)?
A bad finish can act as a handbrake slowing the boat and undoing much of the good work of the drive.
Benefits of a Good Finish
 Good posture at finish rowing
Holding the pressure on through to the end of the stroke accelerates the boat more each stroke. More acceleration during the drive means greater speed once the blades are released. The boat continues to accelerate to a peak which occurs after the oars are out of the water and the athlete has moved onto the recovery phase.
If all blades in a boat hold the pressure on for the same length of time the boat will remain balanced and stable. This provides a better platform for the crew. If the boat is steady as the crew extracts the blades it is easier to stay balanced.
A cleanly executed finish releases the boat to run on and sets up the rower for feathering smoothly and easily before moving fluently into the recovery.
Perils of a Bad Finish
In a bad finish the blades are inefficient and speed is lost and the unevenness of the work in the water upsets balance and poise.
If blades are not held in the water, at the same height as they were during the main drive, and are instead allowed to ride up as the finish is approached the rower is said to be washing out. This wastes energy by turning water to froth instead of propelling the boat and tends to pull that rigger down upsetting the balance. The water thrown up by such a finish often hits the blade of the rower next towards the stern and disrupts her recovery.
When a rower fails to apply sufficient force to the handle in the finish the puddle behind the oar closes up and the blade acts as a handbrake and slows the boat as the drive ends instead of carrying the acceleration on.
When a sculler or crew has differences in the finish from blade to blade and side to side balance is always compromised. The finish must inevitably apply vertical forces to the rigger as the blade is lifted from the water and if these are not equal between riggers the boat will be forced out of balance.
Drawing the handle in
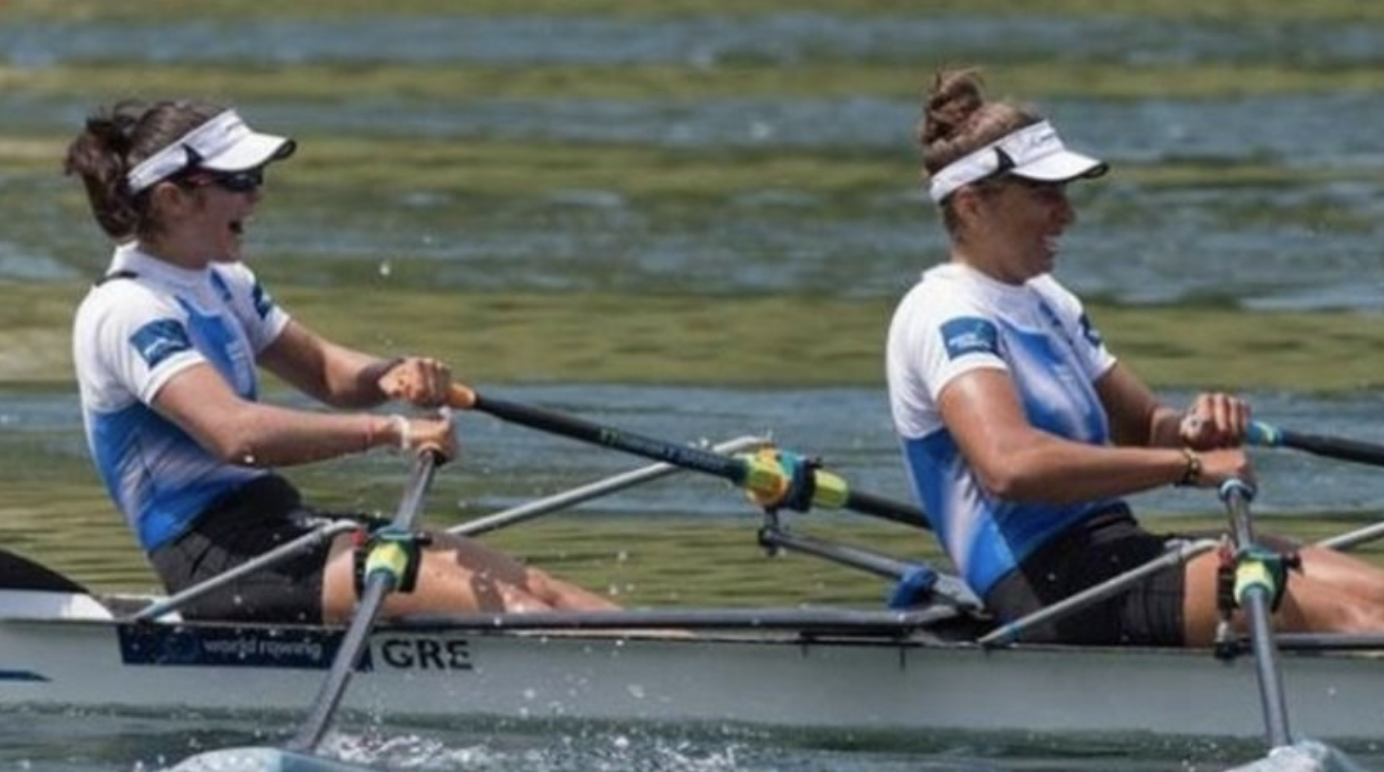 Greek womens double at the finish. Photo Credit: Greek Reporter
In order to produce a good finish the rower must be able to apply power to the handle throughout the stroke. The power for the last part of the drive sequence is provided by the muscles of the shoulders, upper back and upper arms.
To draw the handle to the appropriate height, usually around the first rib, the shoulders are opened, shoulder blades squeezed together, and the elbows drawn past the chest. This requires that the lower back is held firm to provide the base off which the upper body can work. The pelvis should be in the neutral position and the lumbar spine straight and aligned with the pelvis. The shoulders stay low and move only in the horizontal.
The inside arm and elbow move out a little from the body to keep the forearm at right angles to the handle and the outside elbow is allowed to move sufficiently far out from the body so that the elbow, wrist and top knuckles form a horizontal line (as in the photo above).
The handle stops just before the body.
Ways to teach athletes about the finish
- Sit on an ergo with your legs straight, holding the handle with your arms straight.
- Now take your feet off the stretcher. Aaaah … now we see how good your core control is!
- Once you are balanced draw the handle in towards you.
- What happens?
- Put your feet back on the footstretcher but without strapping them in. Leave your legs straight and draw the handle into your body.
- How much sound comes from the flywheel?
- Try again, this time pressing against the footstretcher with your feet as you draw your elbows past your body.
- Hear that?
- And again, starting the push on the whole of your foot on both feet and finishing stretched out to your toes as the elbows draw back. Your legs don’t move but you’ll feel the muscles in your thighs contracting as you stretch.
- How’s that flywheel going now?
A good finish with lots of acceleration stays connected to the boat through the feet.
Extracting the blade
The blade is taken out of the water by tapping (pushing) down with the outside hand (rowing).
Once the blade is out of the water the inside wrist and fingers turn the blade to horizontal (feathered).
The tap down and the feathering movements are separate.
- Think of a high jumper, arm outstretched as they jump over the bar.
- Think of their leading hand as they start jumping; reaching up, stretching over.
In a good clean finish the blade will follow a smooth arc as it comes up and out of the water.
Description of the sculling finish

The essence of the sculling finish is the same as the rowing finish described above. The lower back and pelvis are held firm to provide the fulcrum off which the shoulders and arms work.
The shoulders are opened and then the elbows drawn back past the chest so that the top knuckles, elbows and wrists of each arm form a horizontal line. This requires that the elbows come some distance out from the chest but enables the wrist to be straight and the draw to be applied at right angles to the looms of the sculls.
The handles stop just before the body.